

I decided to give my grinder a bit of a spring clean recently. These instructions are for a doserless grinder but the same steps should also make sense for the doser version just you've got a doser to clean as well :).
Required tools
- Allen key (to fit the adjustment screw bolts)
- Brass wire brush (for general cleaning)
- Awl or other pointed instrument (to clean the grooves of the burrs)
- Nylon Plastic knife or similar (to scrape coffee from the side of the burrs)
- A vacuum cleaner (optional)
- Compressed air (optional)
Warning: As always carry out these instructions at your own risk. If in any doubt you can do this yourself, take your grinder to a specialist.
1. Prepare the grinder
First step before you touch anything - Un-plug the grinder from the mains!!!
Make sure to verify the grinder is truly unplugged. It's dead easy to unplug the wrong thing.
Before you start you'll also want to remove the hopper (first shutting the black plastic flap to retain any beans in it). You'll need to remove the retaining screw first if you're using that. Once the hopper is removed, move any remaing beans back into the hopper.
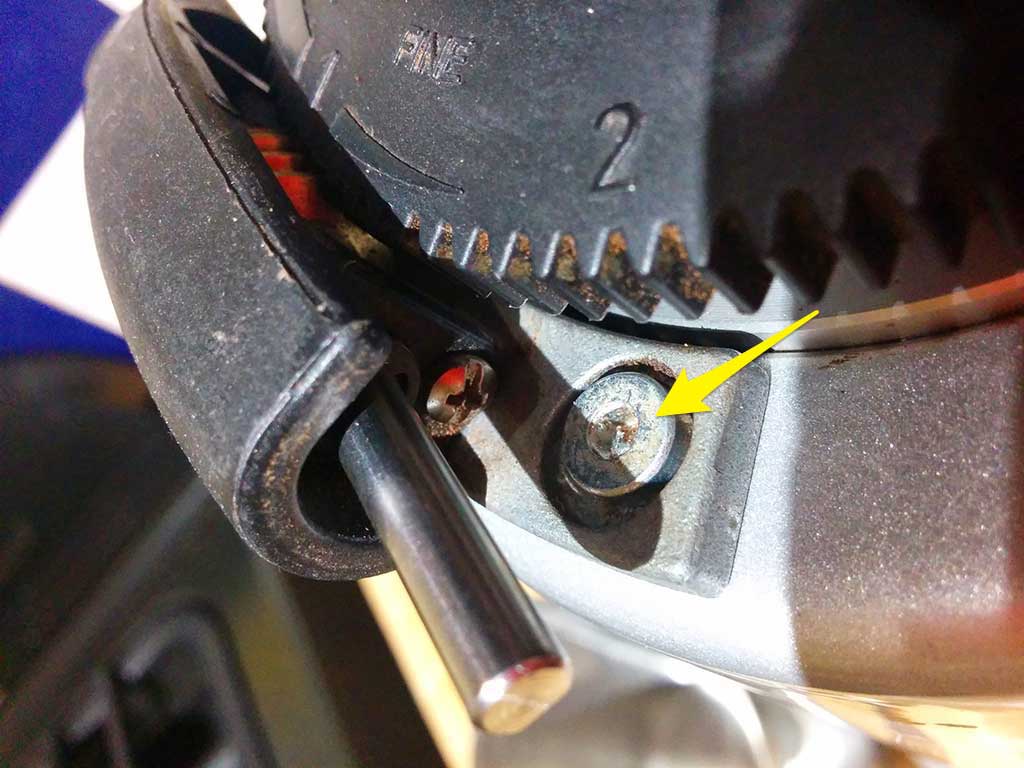
2. Remove the adjustment screw
The Macap M4 is dead easy to take apart. First job is to take the adjustment screw from the body of the grinder.
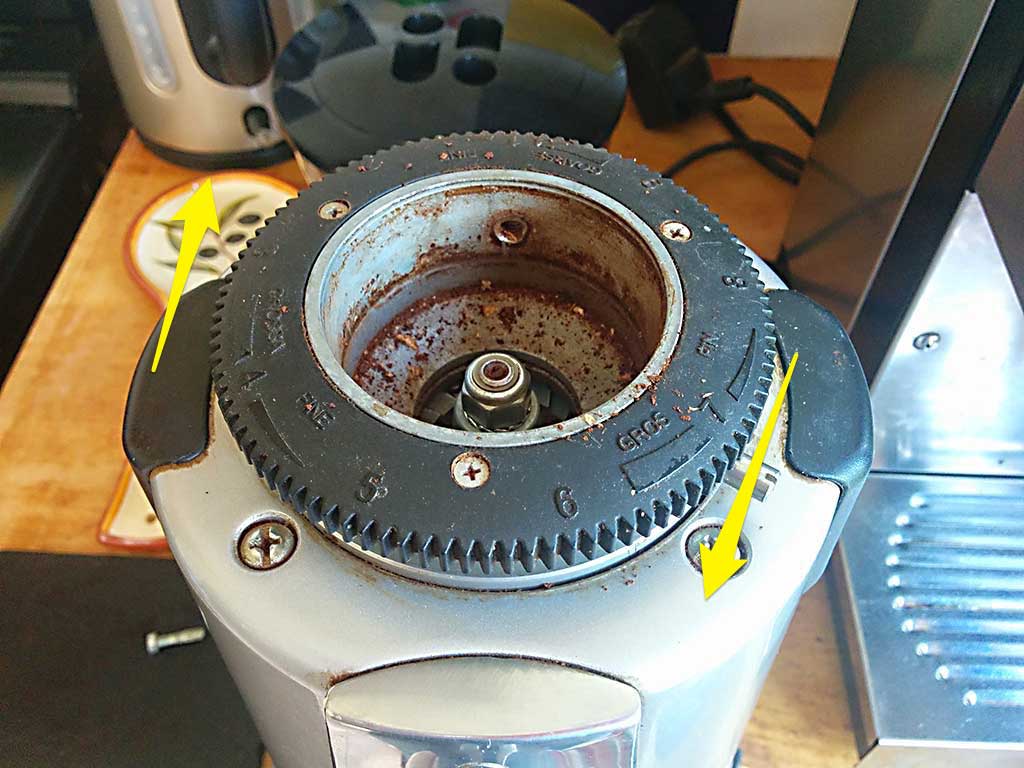
To do this you'll want to prize off the two adjustment knobs you normally hold to change the grind. These come of very easily but take care not to send them flying.
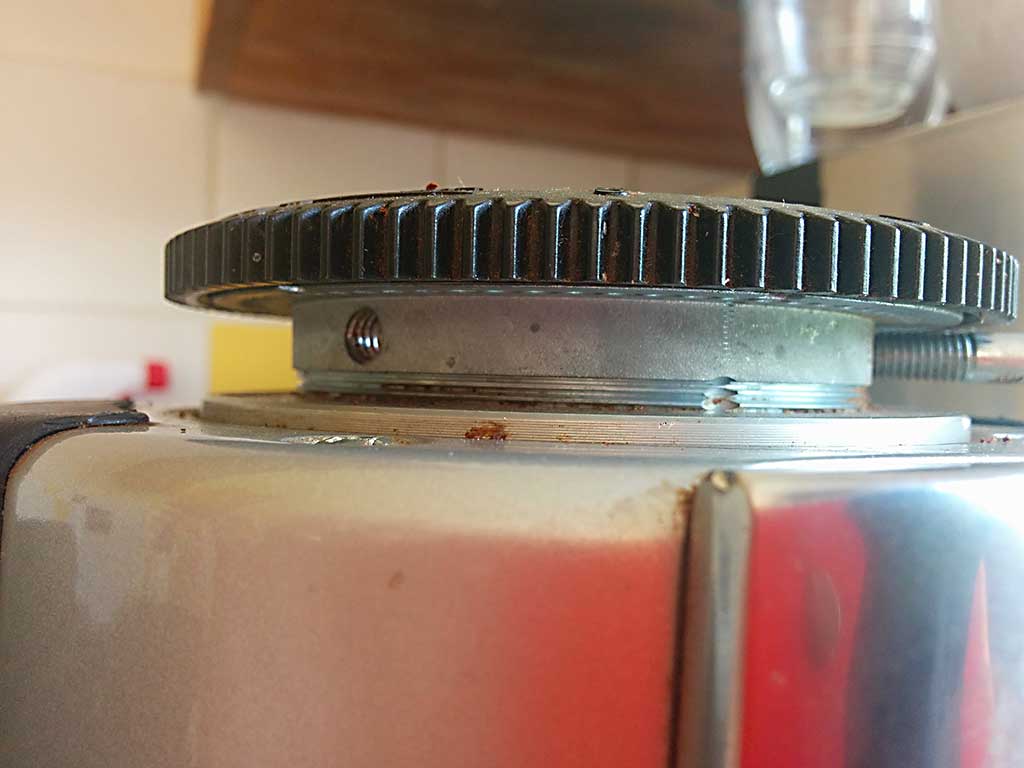
3. Unscrew the top burr
Before unscrewing the burr. Check the amount of thread currently showing. This will help you to get the same as your current settings. (You can also note the position of the grind dial too so you can have things setup exactly how they were when re-assembling).
The burr unscrews towards the coarse direction (clockwise) just unscrew it untils it's completely removed. Take care not to drop it as you will likely write-off the burrs if you do.
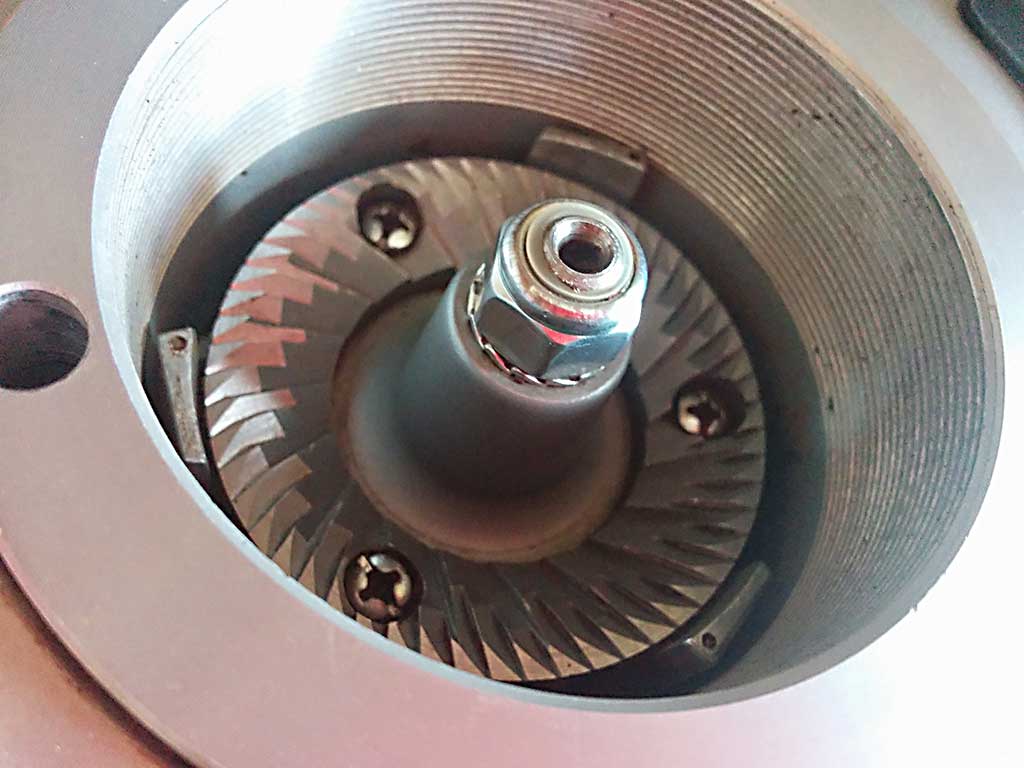
4. Clean everything.
Using the brush and awl clean out as much coffee as possible from all the burr faces and nooks and crannies. Use the brush to clear the threads.
I also use some methylated spirits on a rag to remove the coffee oils from the threads.
If you're using a vacuum cleaner, use it to remove the loose material.

Take care to remove compacted coffee residue from the sides of the lower burr. This gets cakes as the burr rotates to eject the coffee from the chute.
Once it's all clean you're close to being done. But before you put it all back together.
5. Check the burr sharpness.
The burrs should feel sharp to the touch. You can work out if they look like they're going to be in need of replacement any time soon or if they've got plenty of life left in them.
6. Re-assemble
Just do everything in reverse. Take care not to cross-thread the burrs. Also look to get the adjustment back to where you had it in the beginning.
7. Test it out
Replace the hopper with beans, dial in the grind and make yourself a tasty brew.